How Can You Achieve a Professional-Looking Roof Finish with DIY Techniques?
The roof is one of the most critical components of a home. It not only enhances the aesthetic appeal but also protects against weather elements. Achieving a professional-looking roof finish through DIY techniques is entirely feasible. This guide will detail essential approaches, materials, and techniques necessary for a refined roofing project.
Understanding Roof Types and Finishes
Before diving into the DIY process, it’s important to understand the types of roofing materials available. Each material has its own characteristics, advantages, and aesthetic outcomes.
Common Roofing Materials
- Asphalt Shingles: Widely used due to cost-effectiveness and ease of installation.
- Metal Roofing: Durable and provides a modern look; however, it requires specific tools for installation.
- Slate Tiles: Offers a high-end finish but is heavy and requires a professional touch.
- Wood Shakes: Provides a rustic appearance but demands regular maintenance.
Choose a material that complements your home’s architecture while fitting your budget and skills.
Gathering the Right Tools and Materials
For a successful DIY roofing project, gathering the correct tools and materials is essential. Here’s a list to help you get started.
Essential Tools
- Measuring Tape: Crucial for accurate measurements.
- Roofing Nail Gun: Speeds up the installation process.
- Utility Knife: For precise cutting of shingles.
- Ladder: A sturdy ladder ensures safety when working at heights.
- Safety Gear: Includes gloves, helmets, and non-slip footwear.
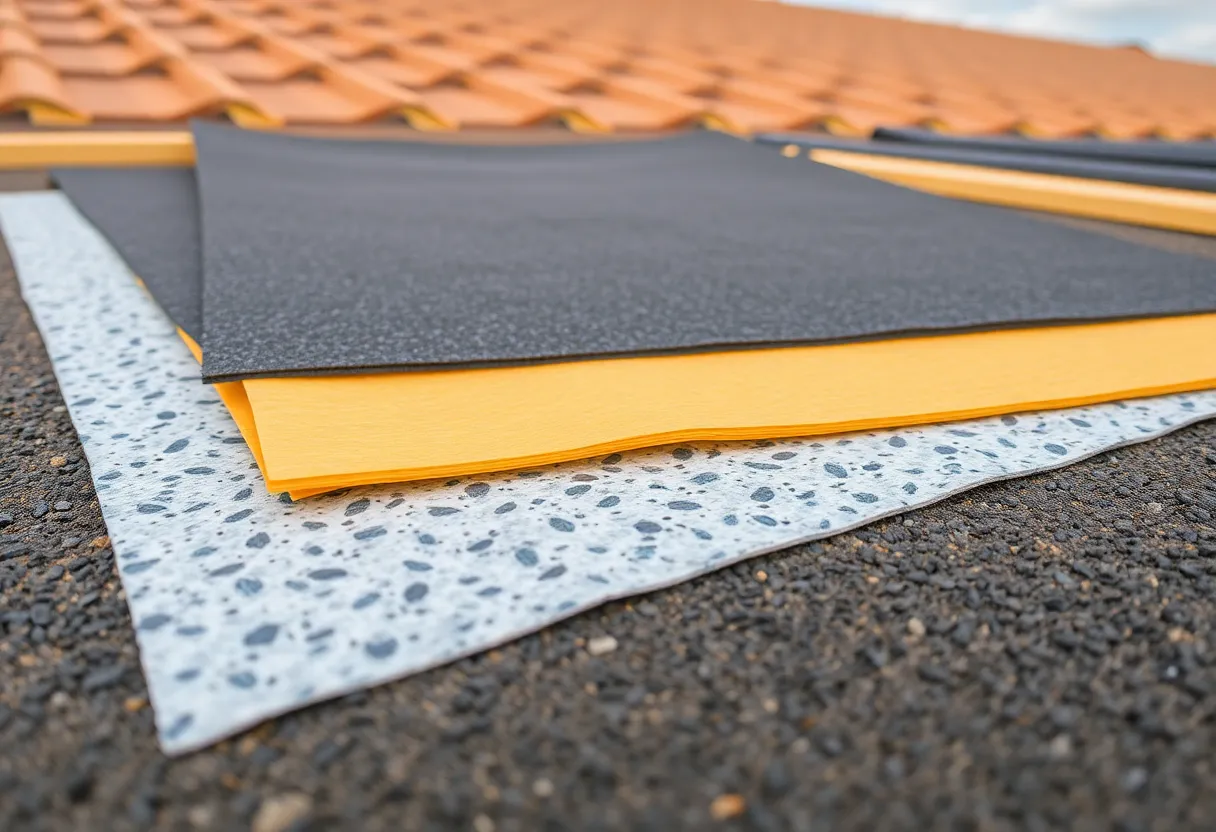
Materials Needed
- Roofing Underlayment: Protects against moisture.
- Flashing: Essential for directing water away from seams.
- Roofing Shingles: Of your chosen material.
- Sealant: For sealing edges and ensuring waterproofing.
Preparing the Roof for Installation
Preparation is crucial for achieving a professional look. Steps include assessing the existing roof, necessary repairs, and planning the layout.
Assessing the Existing Roof
Inspect the current roofing for damage. Look for missing shingles, leaks, or structural issues. If you notice significant damage, consider calling a professional to handle repairs before proceeding.
Creating a Project Plan
A well-thought-out project plan will keep your workflow organized. Define how much time you will need and designate areas for material storage.
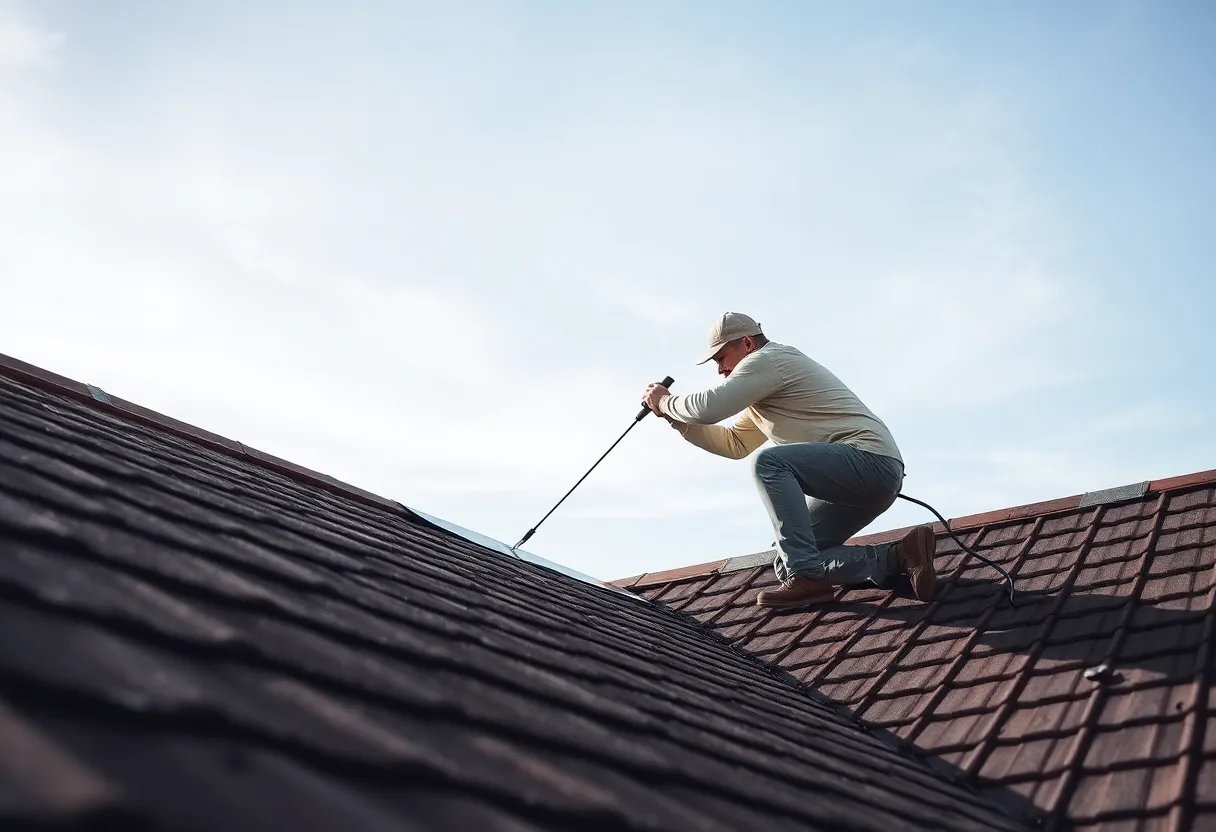
Installation Techniques
Executing proper installation techniques is vital for achieving a professional finish.
Starting with Underlayment
The underlayment is the first line of defense against moisture. Roll it out starting from the lowest point of the roof, overlapping each row. Secure it with staples or nails.
Applying Shingles
Begin installation from the bottom and work your way up. Use a staggered pattern for better coverage. Ensure each shingle is properly aligned with the previous one to maintain a straight appearance.
Nailing Techniques
Use a roofing nail gun for faster installation. Place four nails per shingle at the manufacturer-recommended locations to enhance stability.
Flashing Installation
Install flashing around any protrusions and roof edges to prevent leaks. Overlap each piece to ensure water flows away from the roof joints effectively.
Finishing Touches for a Professional-Looking Roof
After installing the shingles, the next step is to ensure everything looks immaculate and functions correctly.
Cleaning Up
A professional finish begins with a clean job site. Remove all debris, leftover materials, and tools. Make sure nails are picked up from the ground, as they can pose safety hazards.
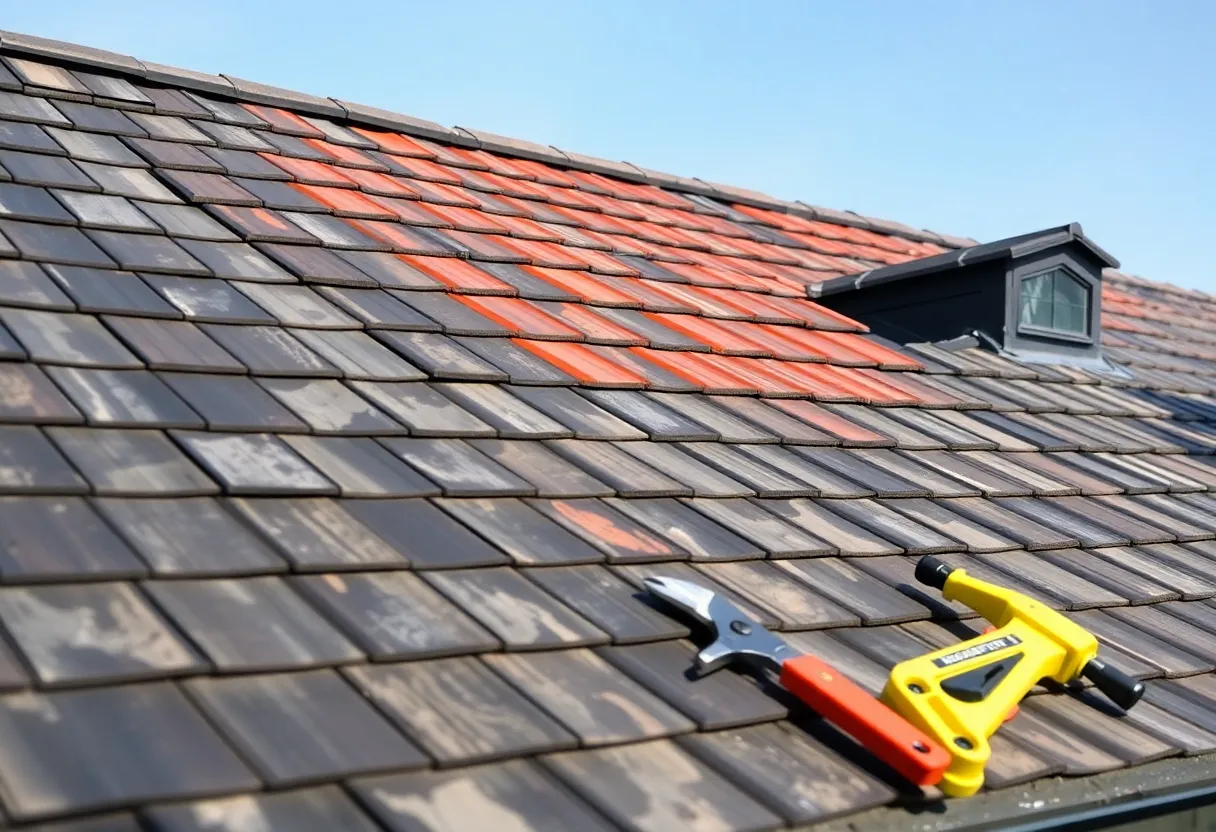
Inspection and Maintenance
Finally, conduct a thorough inspection of the completed work. Check for any loose shingles or misalignments. It’s wise to schedule regular maintenance checks to uphold the roof’s integrity.
DIY Tips for Maintaining a Professional Roof Finish
Once you have achieved your desired roof finish, maintaining its appearance is essential.
Regular Inspections
Inspect your roof at least twice a year. Look for signs of wear or damage, especially after storms.
Cleaning Gutters and Roof Surface
Clogged gutters can cause overflow that damages the roof. Clean gutters regularly and inspect the roof surface for debris.
Addressing Leaks Immediately
If you notice any leaks, address them immediately to prevent extensive damage. Patching small leaks can prevent costly repairs down the line.
Conclusion
Achieving a professional-looking roof finish through DIY techniques is attainable with planning, the right tools, and attention to detail. By selecting suitable materials, adopting proper installation techniques, and maintaining the roof regularly, you can ensure a durable exterior that adds value to your home.
Remember, if at any point the project feels overwhelming or beyond your capabilities, consulting with a roofing professional can provide peace of mind and ensure your home’s protection.
Author: STAFF HERE LEXINGTON WRITER
The LEXINGTON STAFF WRITER represents the experienced team at HERELexington.com, your go-to source for actionable local news and information in Lexington, Fayette County, and beyond. Specializing in "news you can use," we cover essential topics like product reviews for personal and business needs, local business directories, politics, real estate trends, neighborhood insights, and state news affecting the area—with deep expertise drawn from years of dedicated reporting and strong community input, including local press releases and business updates. We deliver top reporting on high-value events such as Woodland Art Fair, Crave Food and Music Festival, and Railbird Festival. Our coverage extends to key organizations like Commerce Lexington and Blue Grass Community Foundation, plus leading businesses in education, manufacturing, and technology that power the local economy such as University of Kentucky, Toyota Motor Manufacturing, and Lexmark. As part of the broader HERE network, including HEREBowlingGreen.com and HERELouisville.com, we provide comprehensive, credible insights into Kentucky's dynamic landscape.